
Keep a subject and replace its background
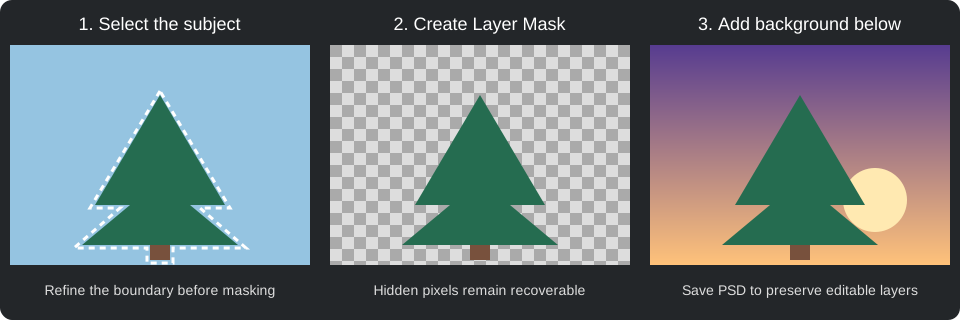
- Open your photo and select its layer in Layers. Choose Object Selection and wait for analysis to finish, then select the subject. For a manual start, use Lasso or Quick Selection.
- Check the strip above the canvas. It shows what you are editing: layer content, a layer mask, channels, or Quick Mask. A selection limits edits; it is not itself a layer mask.
- Press Q to refine with Quick Mask. By default, red marks protected areas. Paint black to exclude more, or white to include more. Use a smaller, softer brush around delicate edges. Press Q again or choose Finish Quick Mask to return to the selection.
- Choose Refine Edge… in the selection bar. Inspect the edge, adjust the refinement controls, and output a Selection. Invert swaps the selected subject and background if you selected the wrong side.
- Choose Create Layer Mask. The selected area stays visible and the rest becomes transparent. The selection clears and the editing target changes to Layer mask. Painting black now hides parts of this layer; white reveals them. The original image pixels remain intact.
- Add a background image as a layer in the same document using the Layers controls, then move it below the masked subject. Do not open it as a separate document. Check the result at full size and refine the subject mask where needed.
- Save a PSD to keep the layers and mask editable. Reopen the saved file to check it, then export PNG for transparency or JPEG for a flattened image with a background.
If an action is unavailable: tap or click it to read the reason. Finish Quick Mask before using the selection actions. Create Layer Mask requires a selection and an unlocked layer without an existing mask; it will not overwrite a mask. Edit an existing mask through its thumbnail instead. Deselect removes the selection boundary but does not remove a layer mask. Undo reverses a completed mask creation.
Choose the right selection tool
| Tool | Good starting point |
|---|---|
| Rectangular / Elliptical Marquee | A regular geometric region. |
| Lasso / Polygonal Lasso | A hand-drawn boundary or a boundary made of straight segments. |
| Object Selection | A recognizable subject or object. |
| Quick Selection | Brushing over a region whose edges should guide the result. |
| Magic Wand | An area of similar color. |
| Selection Brush | Painting a selection directly with a brush. |
Preview an object before selecting it
With Object Selection active, allow image analysis to finish. Hover over a detected region to inspect its colored preview, then click to select it. A hover overlay is temporary; the selection outline indicates the committed selection. When detection is ambiguous, use the tool’s rectangle or lasso region to constrain the target.
The model may download on first use. Keep the page open while its progress is shown. Analysis can take longer on a large image or slower device. Automatic boundaries are a starting point: inspect hair, fur, shadows, gaps between limbs and objects touching the background.
Add, subtract and refine
Use the selection mode controls to add missing areas or subtract unwanted areas instead of starting over. Zoom in for edges and zoom out to judge the whole subject. Select and Mask provides a refinement workflow; use it to improve the boundary before applying a mask or another edit.
For Magic Wand, a greater tolerance accepts a wider range of colors. Contiguous selection limits the result to a connected area; Similar can find matching areas elsewhere. Sample all layers changes the source being analyzed, not which layer receives your edit.
Remove the selection when finished
Choose Select → Deselect pixels when subsequent edits should affect the entire layer. Inverse switches the selected and unselected regions. If a brush, fill or filter unexpectedly affects only a small area, check for an active selection before changing its settings.
Make your first selection without changing any pixels
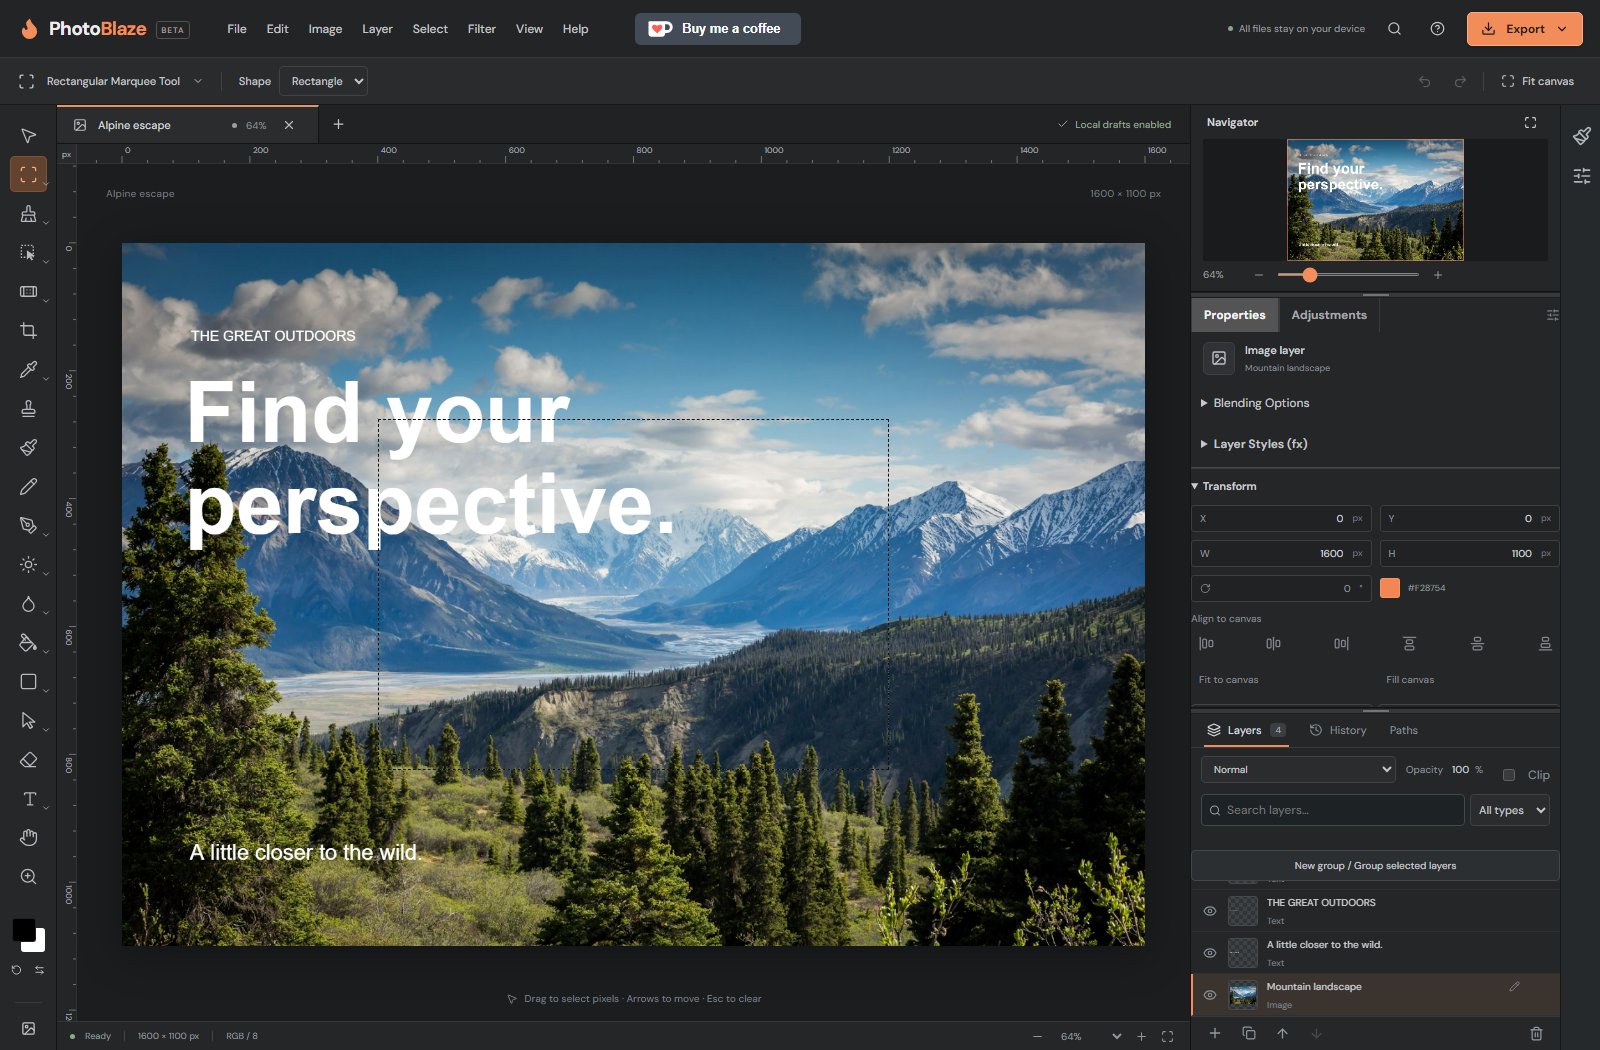
- Open a photo and select its image layer. Choose Rectangular Marquee Tool from the selection tools on the left; hold or open the tool group to reveal related tools.
- Drag a rectangle inside the photo. The moving dashed boundary marks the selected area. The picture itself should not change yet.
- Try a small brush stroke on a duplicate layer: only the portion inside the selection is affected. Undo that stroke.
- Choose Select → Deselect pixels. The boundary disappears and later operations can affect the entire layer.
If the next selection unexpectedly adds to the previous one, check the selection mode. New/replace starts a fresh region; Add keeps existing areas; Subtract removes areas. A selection can remain active when you switch tools.
Hard edges, soft edges and feathering
A hard selection edge has a sharp transition. Feathering makes a gradual transition at the boundary, useful for blending a local correction. A small subject generally needs less feathering than a broad lighting adjustment. Too much creates a visible haze or removes fine detail.
For a cutout, inspect the edge against both light and dark backgrounds. A boundary that looks fine on the original background can have a halo on a new one. Use Select and Mask to refine the edge, then check the finished mask at 100% zoom.