 Photo
PhotoThe six areas you will use most
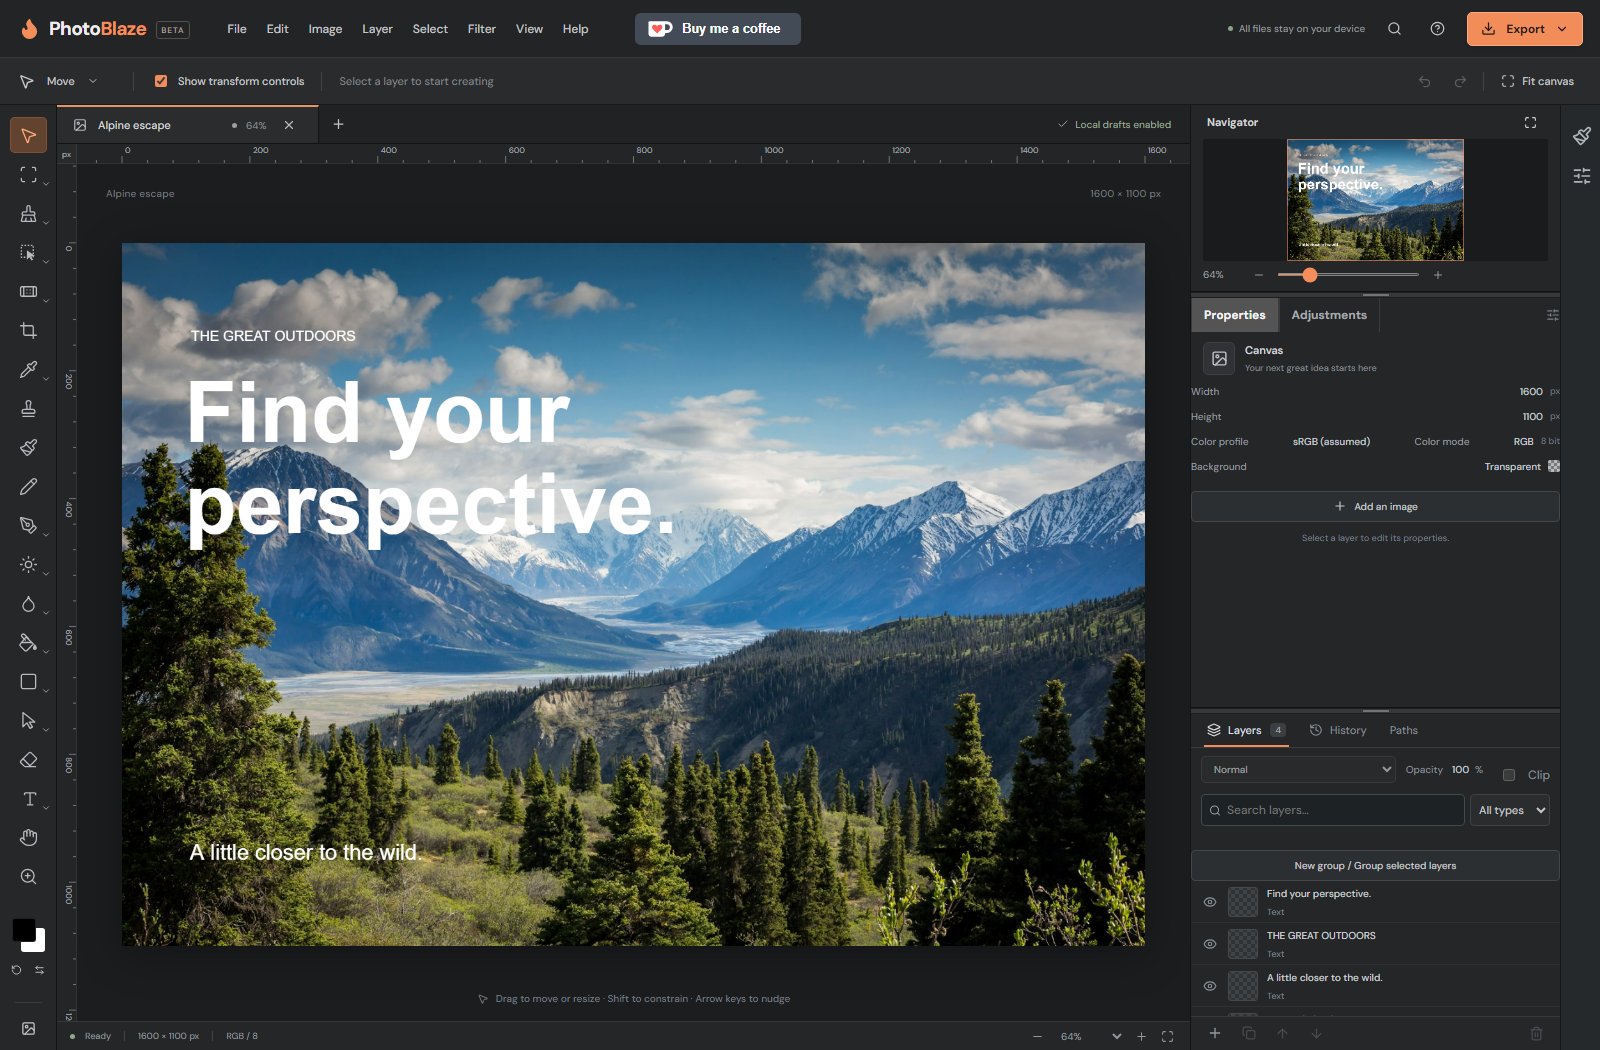
- Top menu: File opens and saves documents; Edit contains editing commands; Image changes document dimensions; Help opens Documentation.
- Options bar: the horizontal row below the menu changes for the selected tool. Look here for brush size, crop ratio and similar settings.
- Left toolbar: choose what action your pointer performs. Hover for a tool name. Some buttons contain related tools, revealed by their group control or a hold.
- Document tabs and canvas: tabs choose the project; the canvas displays the combined artwork. The dark area around it is not part of the exported image.
- Navigator and Properties: Navigator helps you see the whole picture; Properties describes the selected layer. Adjustments is the neighboring tab for creating color corrections.
- Layers and History: Layers chooses which piece you edit. History helps you review completed changes.
Before every edit: tool, layer, selection
Three independent choices determine what happens. The tool chooses the action. The selected layer chooses the object. An active selection can limit the area. Mask editing adds another distinction: are you changing pixels or their visibility?
For example, to move a headline, choose Move and select the headline layer. Choosing Move alone does not tell PhotoBlaze which object you mean. To paint the photo, select its image layer and check that Paint on mask is off.
Zoom and pan without changing your file
Fit canvas makes the whole image visible. Zooming in helps inspect details; zooming out helps judge composition. A 60% view is still the same image with the same number of pixels. It is not a smaller export.
Use the Hand tool to move the view of a zoomed-in document. Inspect sharpness at 100% as well as Fit canvas: a reduced view can hide blurry edges or repair artifacts. If the artwork seems off-screen, use Fit canvas before changing layer positions.
On a smaller window, scroll inside Properties to reveal more controls. Panel dividers separate the right-hand sections; give the area you are using more room when needed. A desktop-sized window is the easiest place to learn.
Undo, redo and recover from a mistake
Use Ctrl Z (Cmd Z on Mac) to undo a completed edit. Redo restores an undone edit when available. Escape often cancels an unfinished gesture or closes a dialog; it is not a substitute for Undo after a change has completed.
Undo is for the current editing session, not long-term backup. Save PSD milestones before a large experiment. If you accidentally hide a layer, use its eye icon to show it instead of undoing unrelated work. If you selected the wrong layer, simply select the right one.