
Your first edit
Select your photo layer and choose Filter → Camera Raw Filter, or Develop photo in Properties. JPEG photos work here too; a camera RAW file is not required.
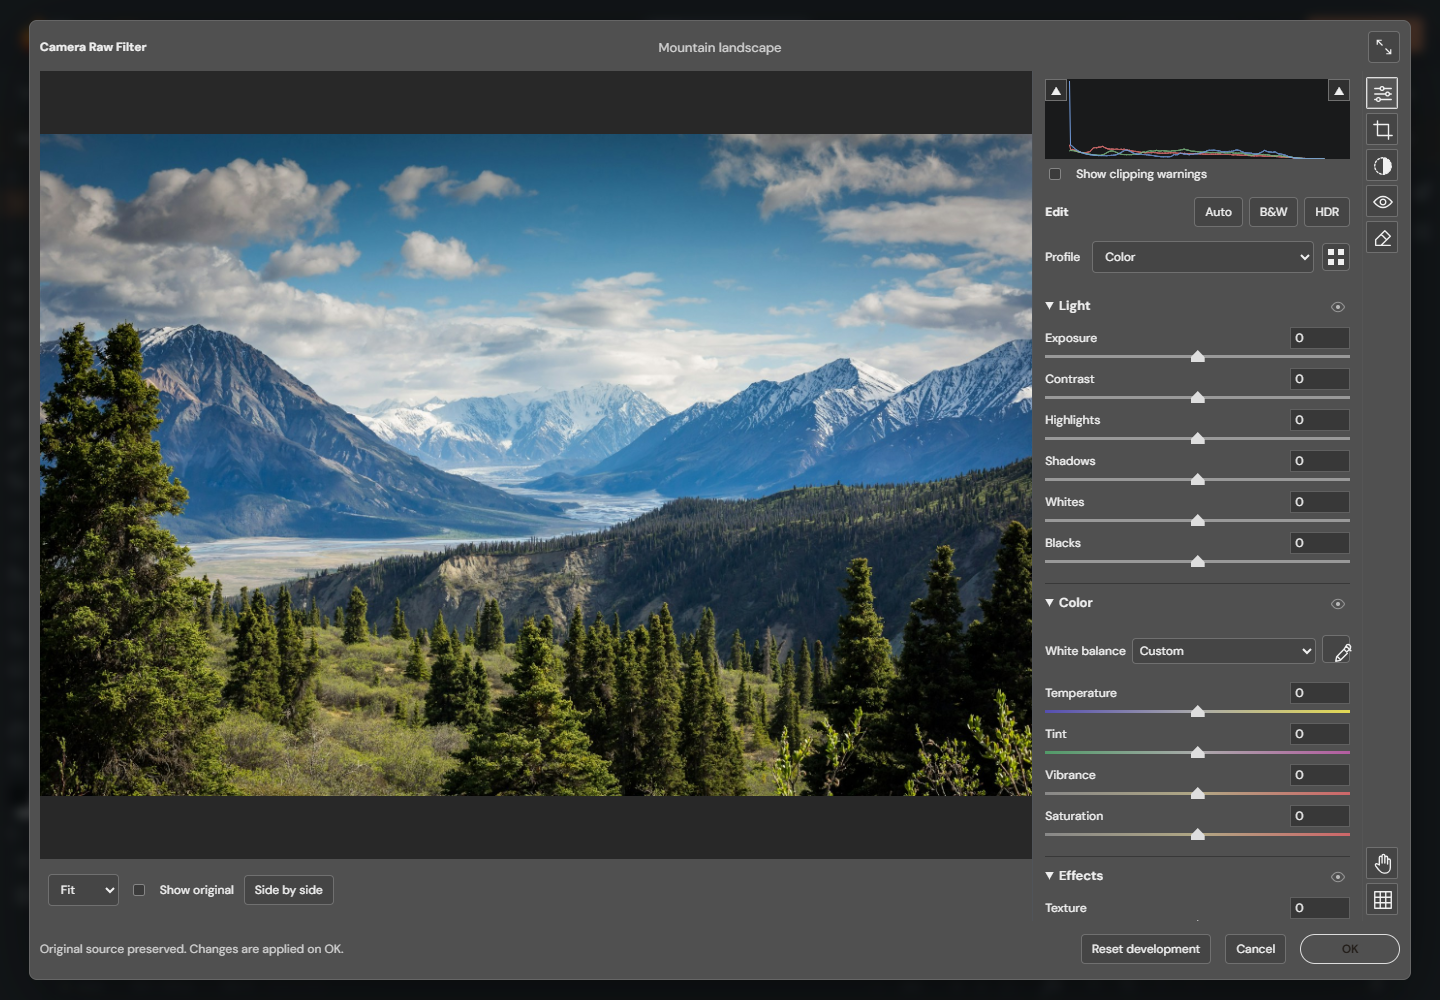
- Choose Fit to see the whole image. The right-hand controls scroll separately from the photograph.
- Try Auto as a starting point. Open Light and adjust Exposure, then Highlights and Shadows. Small changes usually look more natural.
- Open Color. Use the white-balance eyedropper on a neutral gray or white object with visible detail, then fine-tune Temperature and Tint.
- Compare with Show original or Side by side. Choose OK to keep the session or Cancel to discard it.
Light, color and profiles
Exposure changes overall brightness. Contrast separates light and dark tones; Highlights, Shadows, Whites and Blacks target different tonal ranges. Clipping warnings mark bright areas red and dark areas blue. These warnings are a guide, not a promise that lost detail can be recovered.
Temperature and Tint are relative corrections, not Kelvin measurements. Vibrance emphasizes subdued colors; Saturation changes color intensity more broadly. B&W makes a monochrome rendition without deleting your other settings. Profile offers Color and Monochrome; you can also import a local creative CUBE look and adjust its amount. Adobe camera-specific DCP/XMP profiles are not supported.
Balance sky and foreground
Start with Exposure for subject brightness, reduce Highlights for a bright sky, then raise Shadows gently for the foreground. Refine Whites and Blacks last. Histogram shadows are on the left, highlights on the right; a tall peak alone is not a fault. Toggle the two clipping buttons independently. Press P outside input fields to compare the original, then again to restore adjustments. Double-click a slider to reset it. Lost source detail cannot be recovered.
Effects and fine detail
Texture emphasizes smaller detail, Clarity changes local contrast, and Dehaze changes hazy contrast. Use restrained amounts to avoid harsh edges. Vignette darkens or lightens the perimeter; expand it for Midpoint, Roundness and Feather. Grain adds texture, with Size and Roughness controls.
Switch to 100% before judging sharpening or noise reduction in Detail. Hand lets you pan around the enlarged preview. Fit returns to the whole photograph. Hold a panel eye button to compare without that panel; releasing restores it without changing the stored values.
Curve, Color Mixer and Color Grading
Curve offers tonal-region sliders and editable point curves. Choose RGB or an individual channel, add and drag a point, or enter Input and Output values. Arrow keys move the selected point; Delete removes an interior point. Color Mixer changes eight color ranges through Hue, Saturation and Luminance. Point Color targets a sampled color more precisely.
Color Grading adds separate tints to shadows, midtones and highlights. Drag around a wheel for hue and outward for saturation. Luminance changes brightness; Balance and Blending control how the tonal regions overlap. Calibration adjusts shadow tint and RGB primary hue/saturation using PhotoBlaze processing.
Change one color range
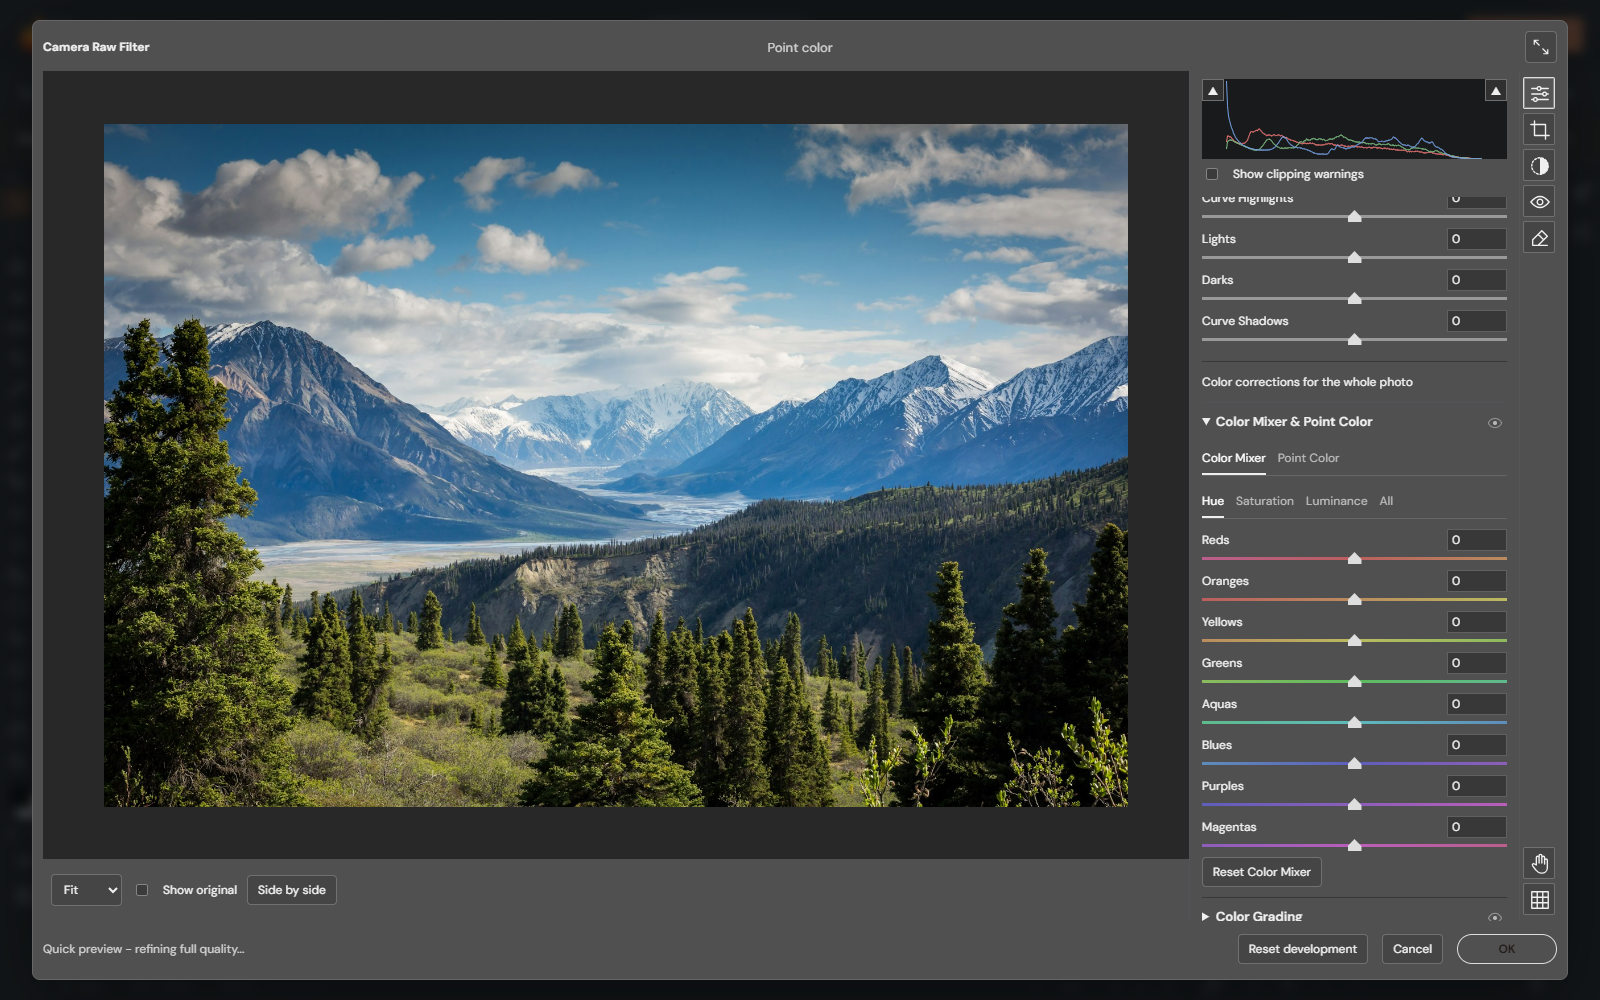
- Open Color Mixer & Point Color and choose Color Mixer. Choose Saturation to adjust color intensity.
- For a blue sky, start with a small increase in Blues, such as +10. Watch the whole photograph: blue water, clothing and shadows can change too.
- Choose Luminance and try a small negative Blues value to darken the sky. Return to Saturation if the result becomes too intense. Switching tabs keeps the settings you already made.
- Hold the panel eye button to compare without the mixer. Double-click a slider to reset that value, or use Reset Color Mixer to clear all eight bands.
- For a more specific shade, choose Point Color, then Sample point color and click the photograph. Adjust its range and correction controls. Return to Color Mixer to leave sampling; your sampled adjustment remains.
Hue shifts a color toward its neighboring colors. Saturation controls intensity, and Luminance controls brightness. All displays the three sets together. Color ranges overlap, so foliage can respond to both Yellows and Greens. If only one object should change, use a local mask; a global color correction also affects matching colors elsewhere. These color controls cannot add color detail to a completely gray sample.
Sharpen detail and reduce noise
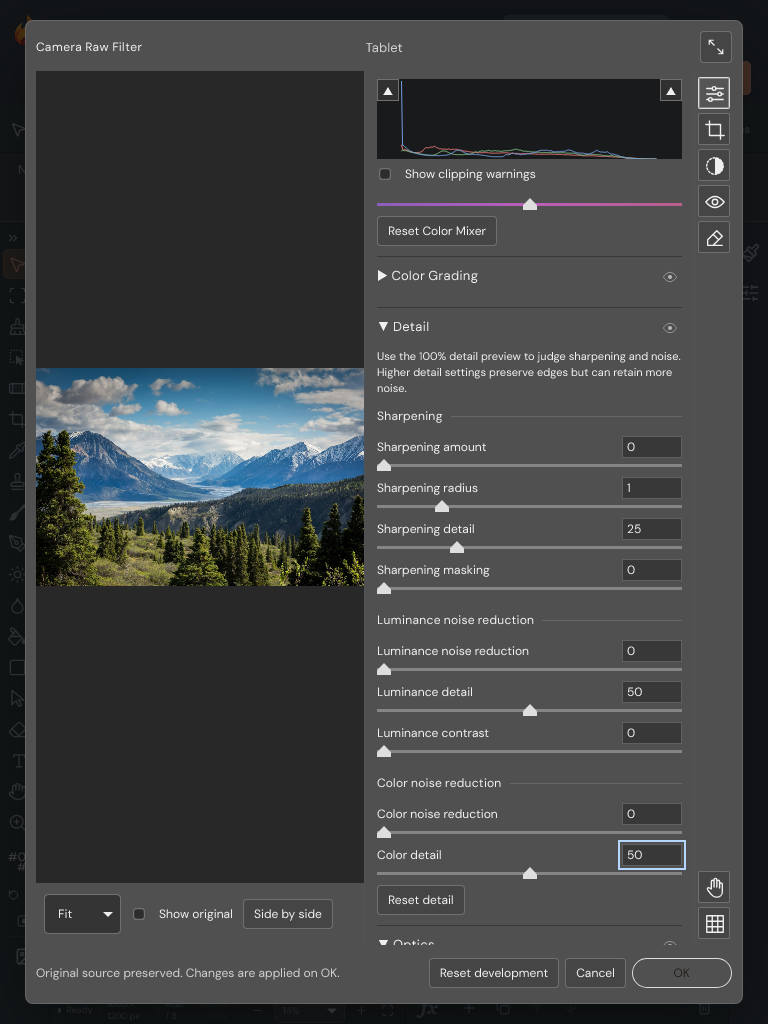
- Choose 100% in the preview zoom control. Use Hand to inspect an area containing both edges and a smooth surface, such as trees against the sky.
- If the image has colored speckles, raise Color noise reduction gradually. Color detail preserves small color edges, but higher values can retain speckles.
- For gray grain or brightness speckles, raise Luminance noise reduction. Stop before skin, foliage or stone looks smooth and artificial. Luminance detail preserves fine structure; Luminance contrast retains local contrast and can also retain noise.
- Raise Sharpening amount gently. Radius changes the width of the edge enhancement. Sharpening detail includes finer texture, which can emphasize noise; Masking limits sharpening toward stronger edges.
- Hold the Detail panel eye button to compare, then release it. Return to Fit to judge the whole image. Choose OK to keep the session or Cancel to discard it.
The supporting sharpening sliders have no visible effect while Sharpening amount is zero. Likewise, Luminance detail and contrast need Luminance noise reduction above zero; Color detail needs Color noise reduction above zero. Double-click a slider to reset only that value. Reset detail restores all nine Detail controls while keeping your other panels unchanged.
Sharpening cannot recreate missing focus or recover a blurred license plate. Strong sharpening can create bright outlines, and excessive noise reduction can erase real texture. Judge both the 100% detail and the final viewing size.
Adjust and reset individual controls
Drag a slider for a visual adjustment, or enter an exact number in its field. Where a numeric field has a scrubbable label, drag that label horizontally to change its value. Double-click an adjustment slider to restore its own default without resetting other settings. Nonzero defaults are retained: for example, Optics Scale and creative-profile Amount return to 100.
In Curve → Parametric, the three dividers beneath the graph control the tonal ranges affected by Shadows, Darks, Lights and Highlights. Drag a divider, or focus it and use arrow keys; Shift moves ten steps. Dividers cannot cross. Double-click returns a divider toward its default position, within its current neighbors.
In Curve → Point curve, choose RGB or an individual color channel. Click the graph to add a point. Input is its original brightness and Output is the resulting brightness, both on a 0–255 scale. Drag a point, type its coordinates, or scrub the Input and Output labels. The first and last points retain Input positions of 0 and 255. Delete point removes an interior point; Reset curve restores only the selected channel. Both curve modes combine in the result and are saved in the Curve preset group.
Correct one part of the photograph
Use Masks and Color Mixer in the tool rail for local corrections. A mask selects where a correction applies; local adjustment values determine what changes. See the mask workspace guide for brush, gradient and automatic-mask workflows.
Choose Remove in the tool rail. Its default Remove mode reconstructs the brushed area from surrounding texture on your device. Click a small blemish or drag over a scratch; use a brush just larger than the unwanted area. For direct control of replacement texture, choose Heal or Clone in the Mode menu and move the green source circle to a clean area. Heal matches surrounding color; Clone copies texture directly. Size, Feather and Opacity remain editable. Select a correction and choose Delete correction to undo that spot. Escape cancels an unfinished stroke. Leave enough clean surrounding pixels for reconstruction; covering the entire image cannot produce a replacement. These tools do not use generative AI. Red-eye correction supports human and pet eyes; fit the correction to the pupil and adjust its controls rather than covering the entire eye.
Straighten a photograph with Optics
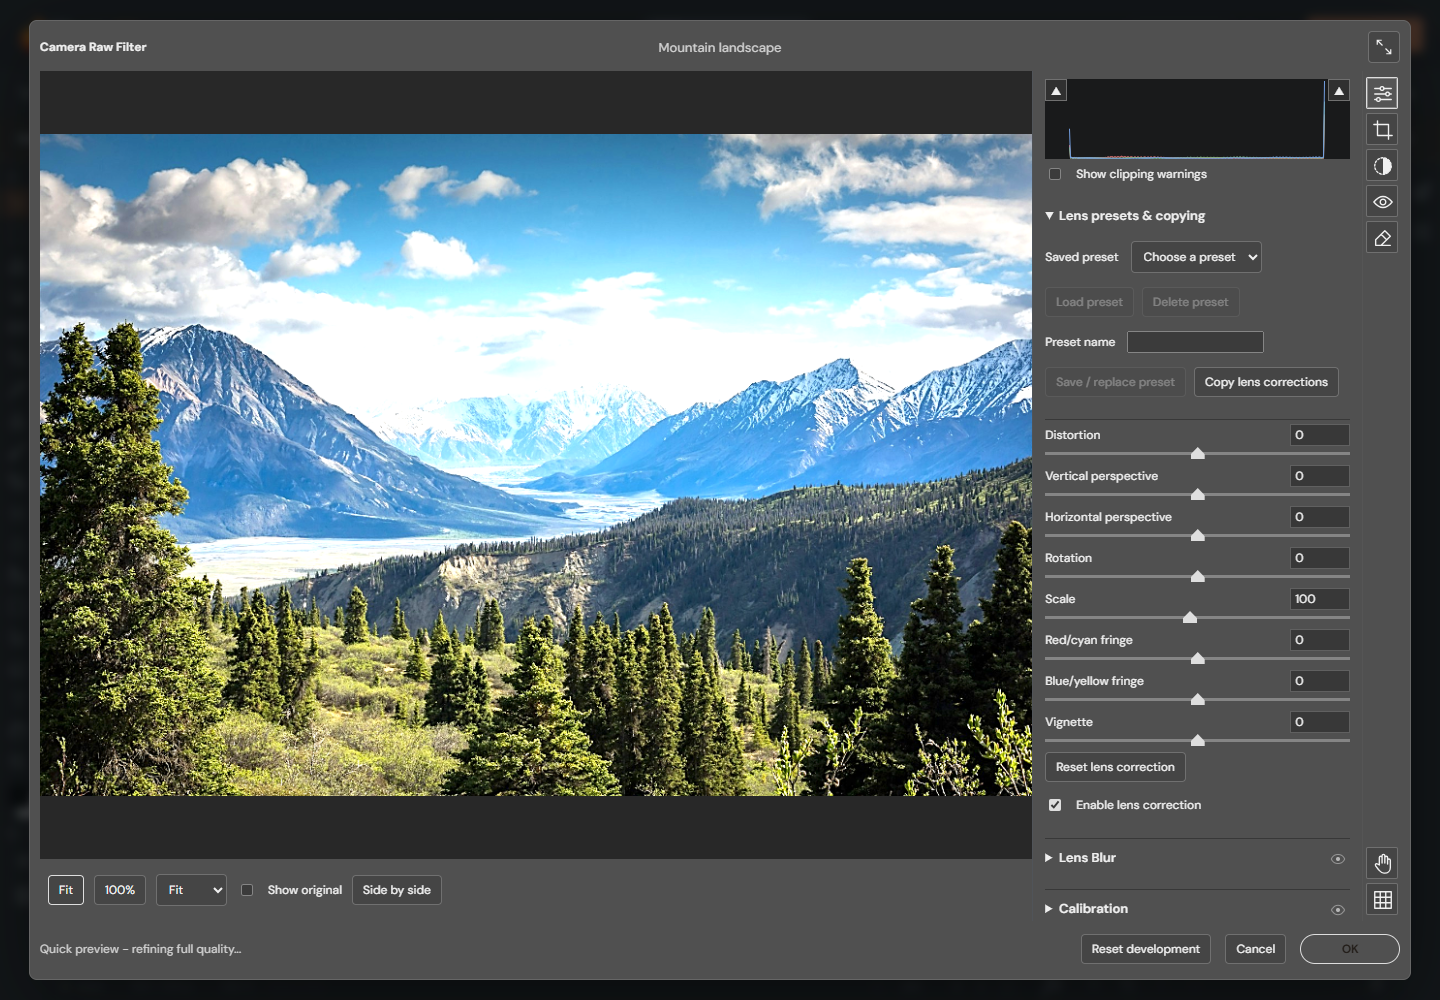
- Open Optics and use Distortion to correct bowed straight lines. Work in small increments.
- Use Vertical perspective for leaning buildings and Horizontal perspective for a view taken from one side. Turn on the alignment grid to judge straight edges.
- Use Rotation to level the horizon. These geometric corrections can reveal transparent corners: increase Scale or use Crop to remove them.
- At 100% zoom, adjust Red/cyan fringe and Blue/yellow fringe to reduce colored edges. Inspect several edges before accepting the result.
- Use Vignette to adjust edge brightness. Hold the Optics preview eye to compare this panel with its corrections temporarily bypassed.
Drag a slider or enter a number for precise changes. Double-click a slider to restore its default; Scale defaults to 100 and the other controls to zero. Reset lens correction resets all eight controls. Saved lens presets reuse your manual settings; they are not automatically detected camera or lens profiles. Finish with OK to apply, or Cancel to discard the session.
Optics and Lens Blur
Optics provides lens correction and straightening. Enable Apply in Lens Blur before adjusting blur strength and aperture shape. Without a depth map, blur is uniform. Import a grayscale PNG, JPEG or WebP depth map under Focus Range to control which depths remain sharp. PhotoBlaze does not automatically estimate scene depth.
Click or drag on the depth preview, or use Pick focus on photograph, to select a sharp depth or interval. Near and Far provide exact bounds. Invert reverses the depth interpretation. Focus and Blur refinement brushes edit the map: Size changes the footprint, Feather softens its edge, and Amount and Flow control strength. A translucent trail appears while dragging; the depth edit applies on release. Escape cancels a pending stroke. The map is saved with the editable filter.
Remove flash reflections from eyes
- Choose 100% and use Hand to bring the eye into view. Select Red-eye correction in the right-hand tool rail.
- Choose Red Eye for a red human pupil, or Pet Eye for a green, yellow or pale flash reflection in an animal pupil.
- Drag a rectangle around one affected pupil. PhotoBlaze tries to fit a compact flash-colored region inside your rectangle. If it cannot identify one confidently, it keeps your drawn bounds.
- Drag the correction to reposition it, or drag its edge handles to resize it. Keep the correction over the pupil rather than the iris, eyelid or surrounding fur. Repeat for the other eye.
- Adjust Pupil Size to control how much of the region is corrected. Red Eye also offers Darken. For Pet Eye, Add Catchlight adds a small highlight; turn it off if it looks artificial.
- Uncheck Show Overlay to inspect the result without correction outlines. This hides the guides only. Recheck it to adjust the rectangles again.
- Choose OK to keep the session, or Cancel to discard it.
Automatic fitting uses local color and contrast, not face or animal recognition. A white reflection, colored iris or nearby bright detail can confuse it; inspect each result and resize the region manually when needed. This tool corrects flash color rather than reconstructing lost eye detail.
What HDR mode means here
HDR mode retains extended-range floating-point values in editable PhotoBlaze processing. Its histogram includes exposure stops above ordinary reference white. On supported HDR displays, a compatible WebGPU browser can show an extended-range preview. Other displays use an SDR rendition. Before comparisons, white-balance sampling and Smart Filter mask compositing retain floating-point samples. Clipping overlays use the SDR display canvas to show warnings for the working range; they are not a measurement of your monitor’s brightness. Standard image exports do not become HDR exports by enabling this button. Use Export HDR layer (EXR) to save the developed layer at full resolution with floating-point HDR color and transparency. This export does not change the document, combine other layers, or apply document framing/crop. Keep an editable PhotoBlaze project when you need to retain development settings and source data.
Keep your work editable
OK commits the session as an undoable edit; Cancel discards it. Reopen Develop photo to revise an existing development entry. Save a PhotoBlaze PSD to retain supported editable settings and source attachments. Other editors can display the rendered result, but these are PhotoBlaze settings rather than native Adobe Camera Raw descriptors. Keep the original PhotoBlaze PSD when exchanging files with another editor.
RAW decoding occurs when opening the file. Development sliders work on the decoded RGB source; they do not re-decode the camera mosaic or reconstruct sensor highlights clipped during import. PhotoBlaze uses its own local processing algorithms, so results are not pixel-identical to Adobe Camera Raw.