 Photo
Photo1. Open a photo
Open the editor, then choose File → Open. Select a photo or PSD from your computer. Opening a file creates a document tab; it does not add the photo to the existing composition. To combine images, use Place image as layer instead.
The Alpine escape sample is a practice document. You can experiment on it without changing the original file on your computer. Click document tabs above the canvas to switch between projects.
2. Find your way around
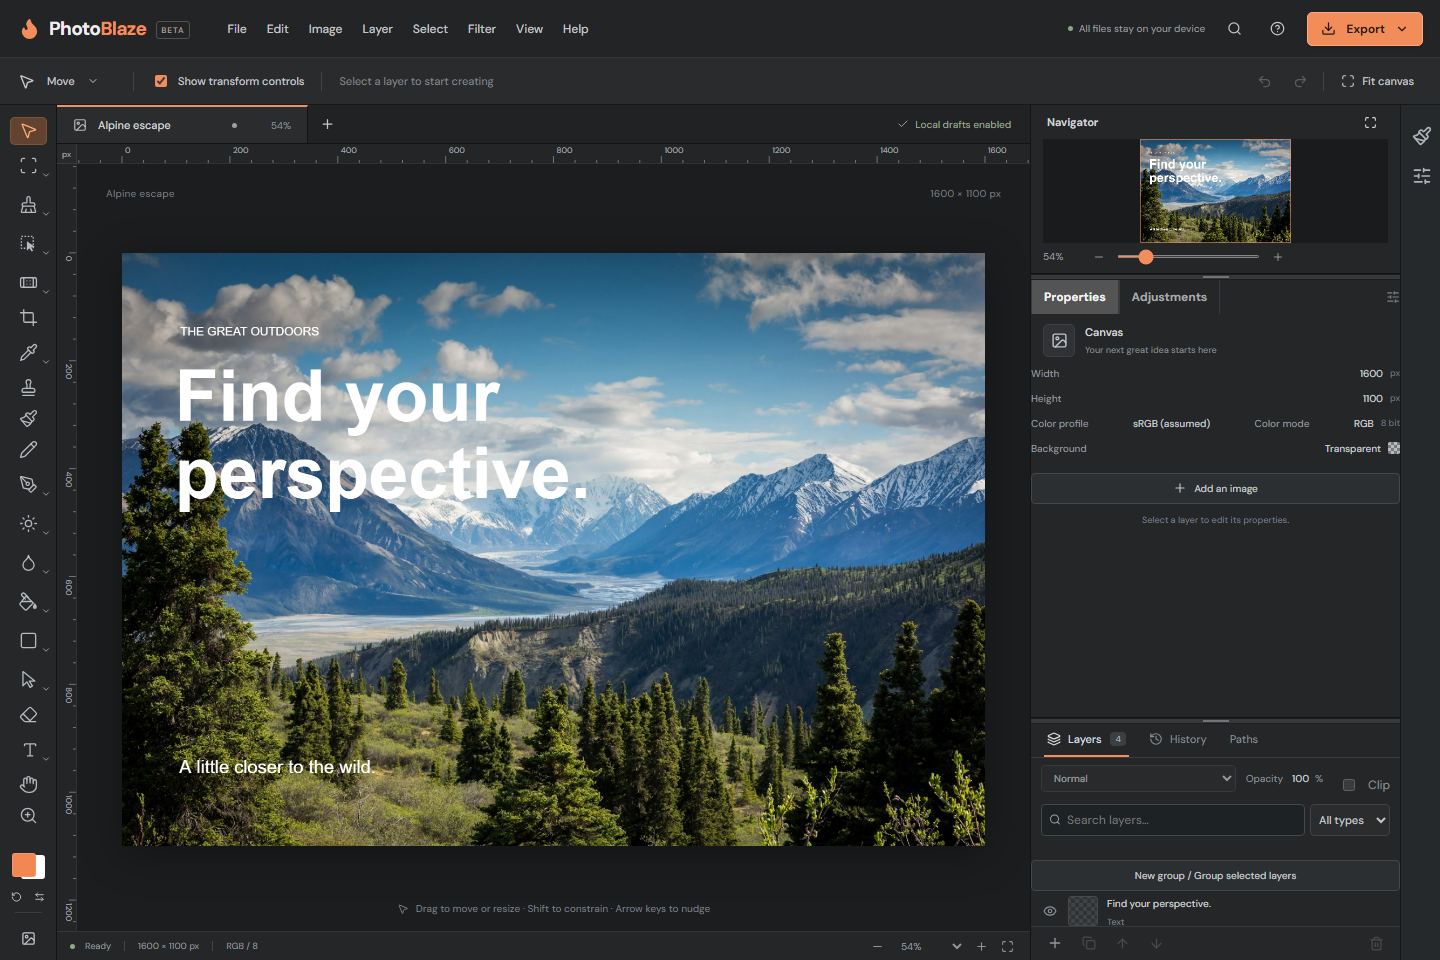
Select a layer in the Layers panel before editing it. The selected row identifies what your next operation will affect. Properties shows controls for that layer; the tool options bar controls the active tool. These are different sets of controls.
Use Fit canvas to bring the whole document into view. Zoom changes only the view, not the exported image dimensions. Use the Hand tool to move around a zoomed image.
3. Make a safe first change
- Select a layer in Layers and duplicate it before trying a destructive effect.
- Use the Move tool to position the copy. Change its opacity to see the original underneath.
- Choose an adjustment or filter appropriate to the selected layer. Inspect the result at 100% zoom as well as fit-to-window.
- Use Undo if the result is not useful. Toggle the layer’s visibility to compare before and after.
A hidden layer still belongs to the document. Deleting it removes it; hiding it simply excludes it from the visible composition.
4. Keep an editable copy and a finished copy
Choose File → Save PSD to download your editable document. Then export a PNG for transparency or a JPEG for a typical photograph. Saving a PSD and exporting an image serve different purposes: keep both when you may want to revise the work.
Check the downloaded file in your Downloads folder. Open the exported image to confirm its dimensions, appearance and transparency before sending it to someone else.